WSL 相关
https://learn.microsoft.com/zh-cn/windows/wsl/
多子系统管理
Section titled “多子系统管理”查看已安装的 WSL 分发版
Section titled “查看已安装的 WSL 分发版”设置默认子系统
Section titled “设置默认子系统”启动指定的 wsl 子系统发行版
Section titled “启动指定的 wsl 子系统发行版”更新到预览版
Section titled “更新到预览版”共享 USB 设备
Section titled “共享 USB 设备”安装 usbipd
Section titled “安装 usbipd”https://learn.microsoft.com/zh-cn/windows/wsl/connect-usb
Windows 端 usbipd 的使用
Section titled “Windows 端 usbipd 的使用”查看可共享的 USB 设备
Section titled “查看可共享的 USB 设备”绑定 USB 设备
Section titled “绑定 USB 设备”激活 USB 设备
Section titled “激活 USB 设备”查看 USB 设备
Section titled “查看 USB 设备”使用 USB 设备
Section titled “使用 USB 设备”此处以 minicom 为例
USBIP Connect 插件
Section titled “USBIP Connect 插件”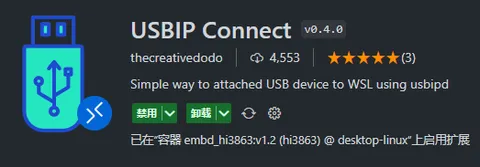
高级文件管理
Section titled “高级文件管理”记事本打开文件
Section titled “记事本打开文件”资源管理器打开文件夹
Section titled “资源管理器打开文件夹”Linux GUI 应用
Section titled “Linux GUI 应用”Gnome 文本编辑器
Section titled “Gnome 文本编辑器”Gnome 文本编辑器是 GNOME 桌面环境的默认文本编辑器。
若要在编辑器中启动 bashrc 文件,请输入:gnome-text-editor ~/.bashrc
跨文件系统命令替代
Section titled “跨文件系统命令替代”Nautilus 文件管理器
Section titled “Nautilus 文件管理器”Nautilus 也称为 GNOME Files,是 GNOME 桌面的文件管理器。 (类似于 Windows 文件资源管理器)。
若要启动,请输入:nautilus
跨文件系统命令替代
Section titled “跨文件系统命令替代”code 命令失效
Section titled “code 命令失效”- 在 wsl 中使用记事本打开
~/.bashrc文件
- 在文件中添加 code 的环境变量
设置默认启动用户
Section titled “设置默认启动用户”要在 WSL 中设置默认启动用户为非 root 用户,可以按以下步骤操作:
- 打开 WSL 终端。
- 输入以下命令以编辑配置文件(假设你使用的是 Ubuntu):
- 添加以下内容:
确保将 “你的用户名” 替换为实际的非 root 用户名。
- 保存文件并退出(在 nano 中按
Ctrl + X,然后按Y确认保存)。 - 关闭 WSL,并在 PowerShell 中运行以下命令以重新加载 WSL:
- 再次打开 WSL,应该会默认以指定的用户登录。
WSL 指定盘使用
Section titled “WSL 指定盘使用”关键命令帮助
Section titled “关键命令帮助”WSL 盘符迁移
Section titled “WSL 盘符迁移”导出现有的 WSL 发行版
Section titled “导出现有的 WSL 发行版”卸载现有的 WSL 发行版
Section titled “卸载现有的 WSL 发行版”导入到新的位置
Section titled “导入到新的位置”Failed to attach
Section titled “Failed to attach”检查 usbipd 是否被安装
Section titled “检查 usbipd 是否被安装”如果未安装
要检查防火墙设置,可以按照以下步骤操作:
在 Windows 上检查防火墙设置:
Section titled “在 Windows 上检查防火墙设置:”- 打开“控制面板”,然后选择“系统和安全”。
- 点击“Windows 防火墙”。
- 在左侧菜单中,点击“高级设置”。
- 在“入站规则”中查找是否有与
usbipd或端口 3240 相关的规则。如果没有,你可以手动添加规则。
添加防火墙规则允许端口 3240:
Section titled “添加防火墙规则允许端口 3240:”- 在“高级设置”中,点击“入站规则”。
- 选择右侧的“新建规则”。
- 选择“端口”并点击“下一步”。
- 选择“TCP”,然后输入“3240”端口号。
- 选择“允许连接”,然后完成向导。
临时禁用防火墙:
Section titled “临时禁用防火墙:”- 打开“控制面板”,选择“系统和安全”。
- 点击“Windows 防火墙”。
- 在左侧菜单中,点击“启用或关闭 Windows 防火墙”。
- 选择“关闭 Windows 防火墙(不推荐)”。